
Want to launch your WordPress site on a reliable and fully managed hosting platform? At EyHost, we make it incredibly easy to order a managed WordPress hosting plan, point your domain, and keep your site running smoothly—all without downtime. In this guide, we’ll walk you through the process step-by-step: from selecting and ordering your hosting, to updating DNS settings and ensuring your WordPress site stays live. Whether you’re new to hosting or experienced, this tutorial will help you get started in no time.
Step 1:
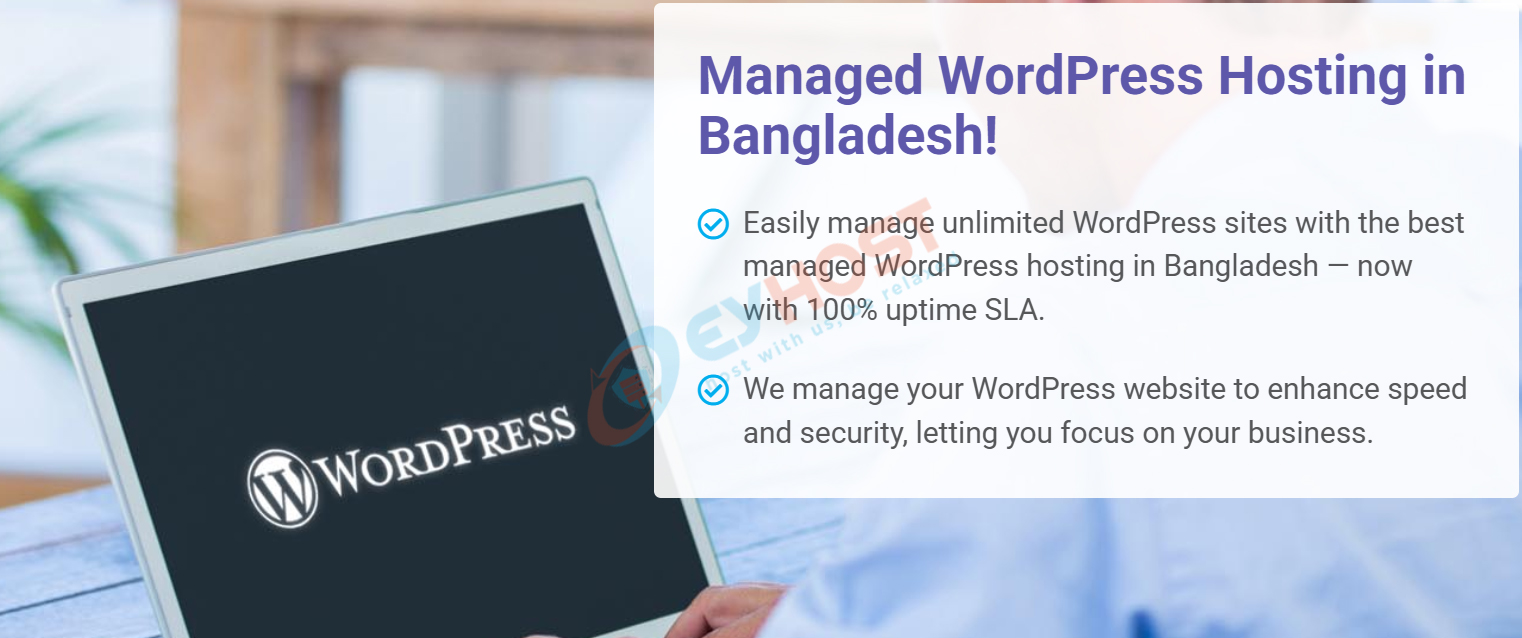
Visit https://www.eyhost.biz and click on the “WordPress” menu. You’ll land on the Managed WordPress Hosting page, showcasing all available plans each with pricing and features.
Browse through the options and select the plan that best fits your website needs. Once you’ve decided, click the “Order Now” button under your chosen plan. You can select your preferred billing cycle (monthly, semi-annually, or annually) before proceeding as well can adjust in the next step.
Step 2:
On the order page, choose your preferred billing cycle—Monthly, Semi-Annually, or Annually—based on your budget and hosting duration. After selecting the option, click the “Continue” button to proceed. The billing cycle also can be adjusted in the next step as well.

Step 3:
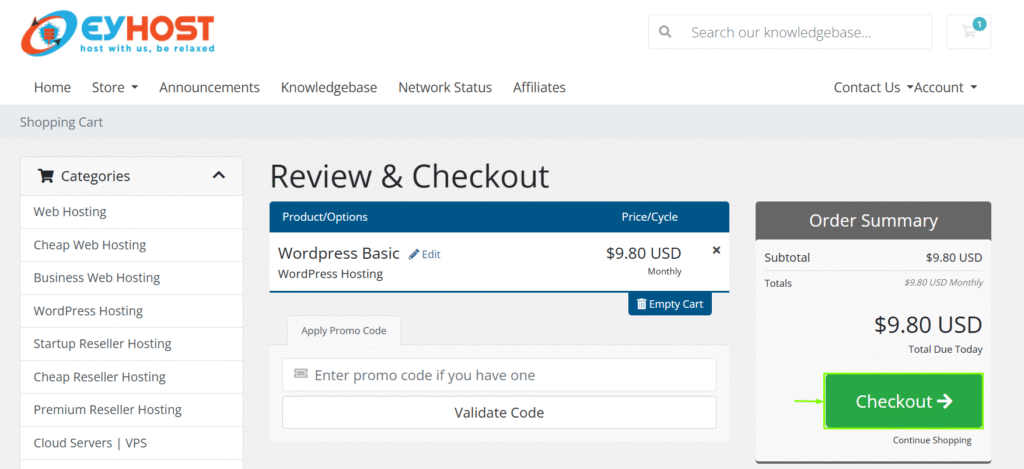
Review your order summary and click on the “Checkout” button to move forward.
If there’s an ongoing promotion, it will be automatically applied if you’re a new client ordering directly from the hosting order page.
Alternatively, you can also manually enter a promo code (if you have one) before finalizing the order.
Step 4:
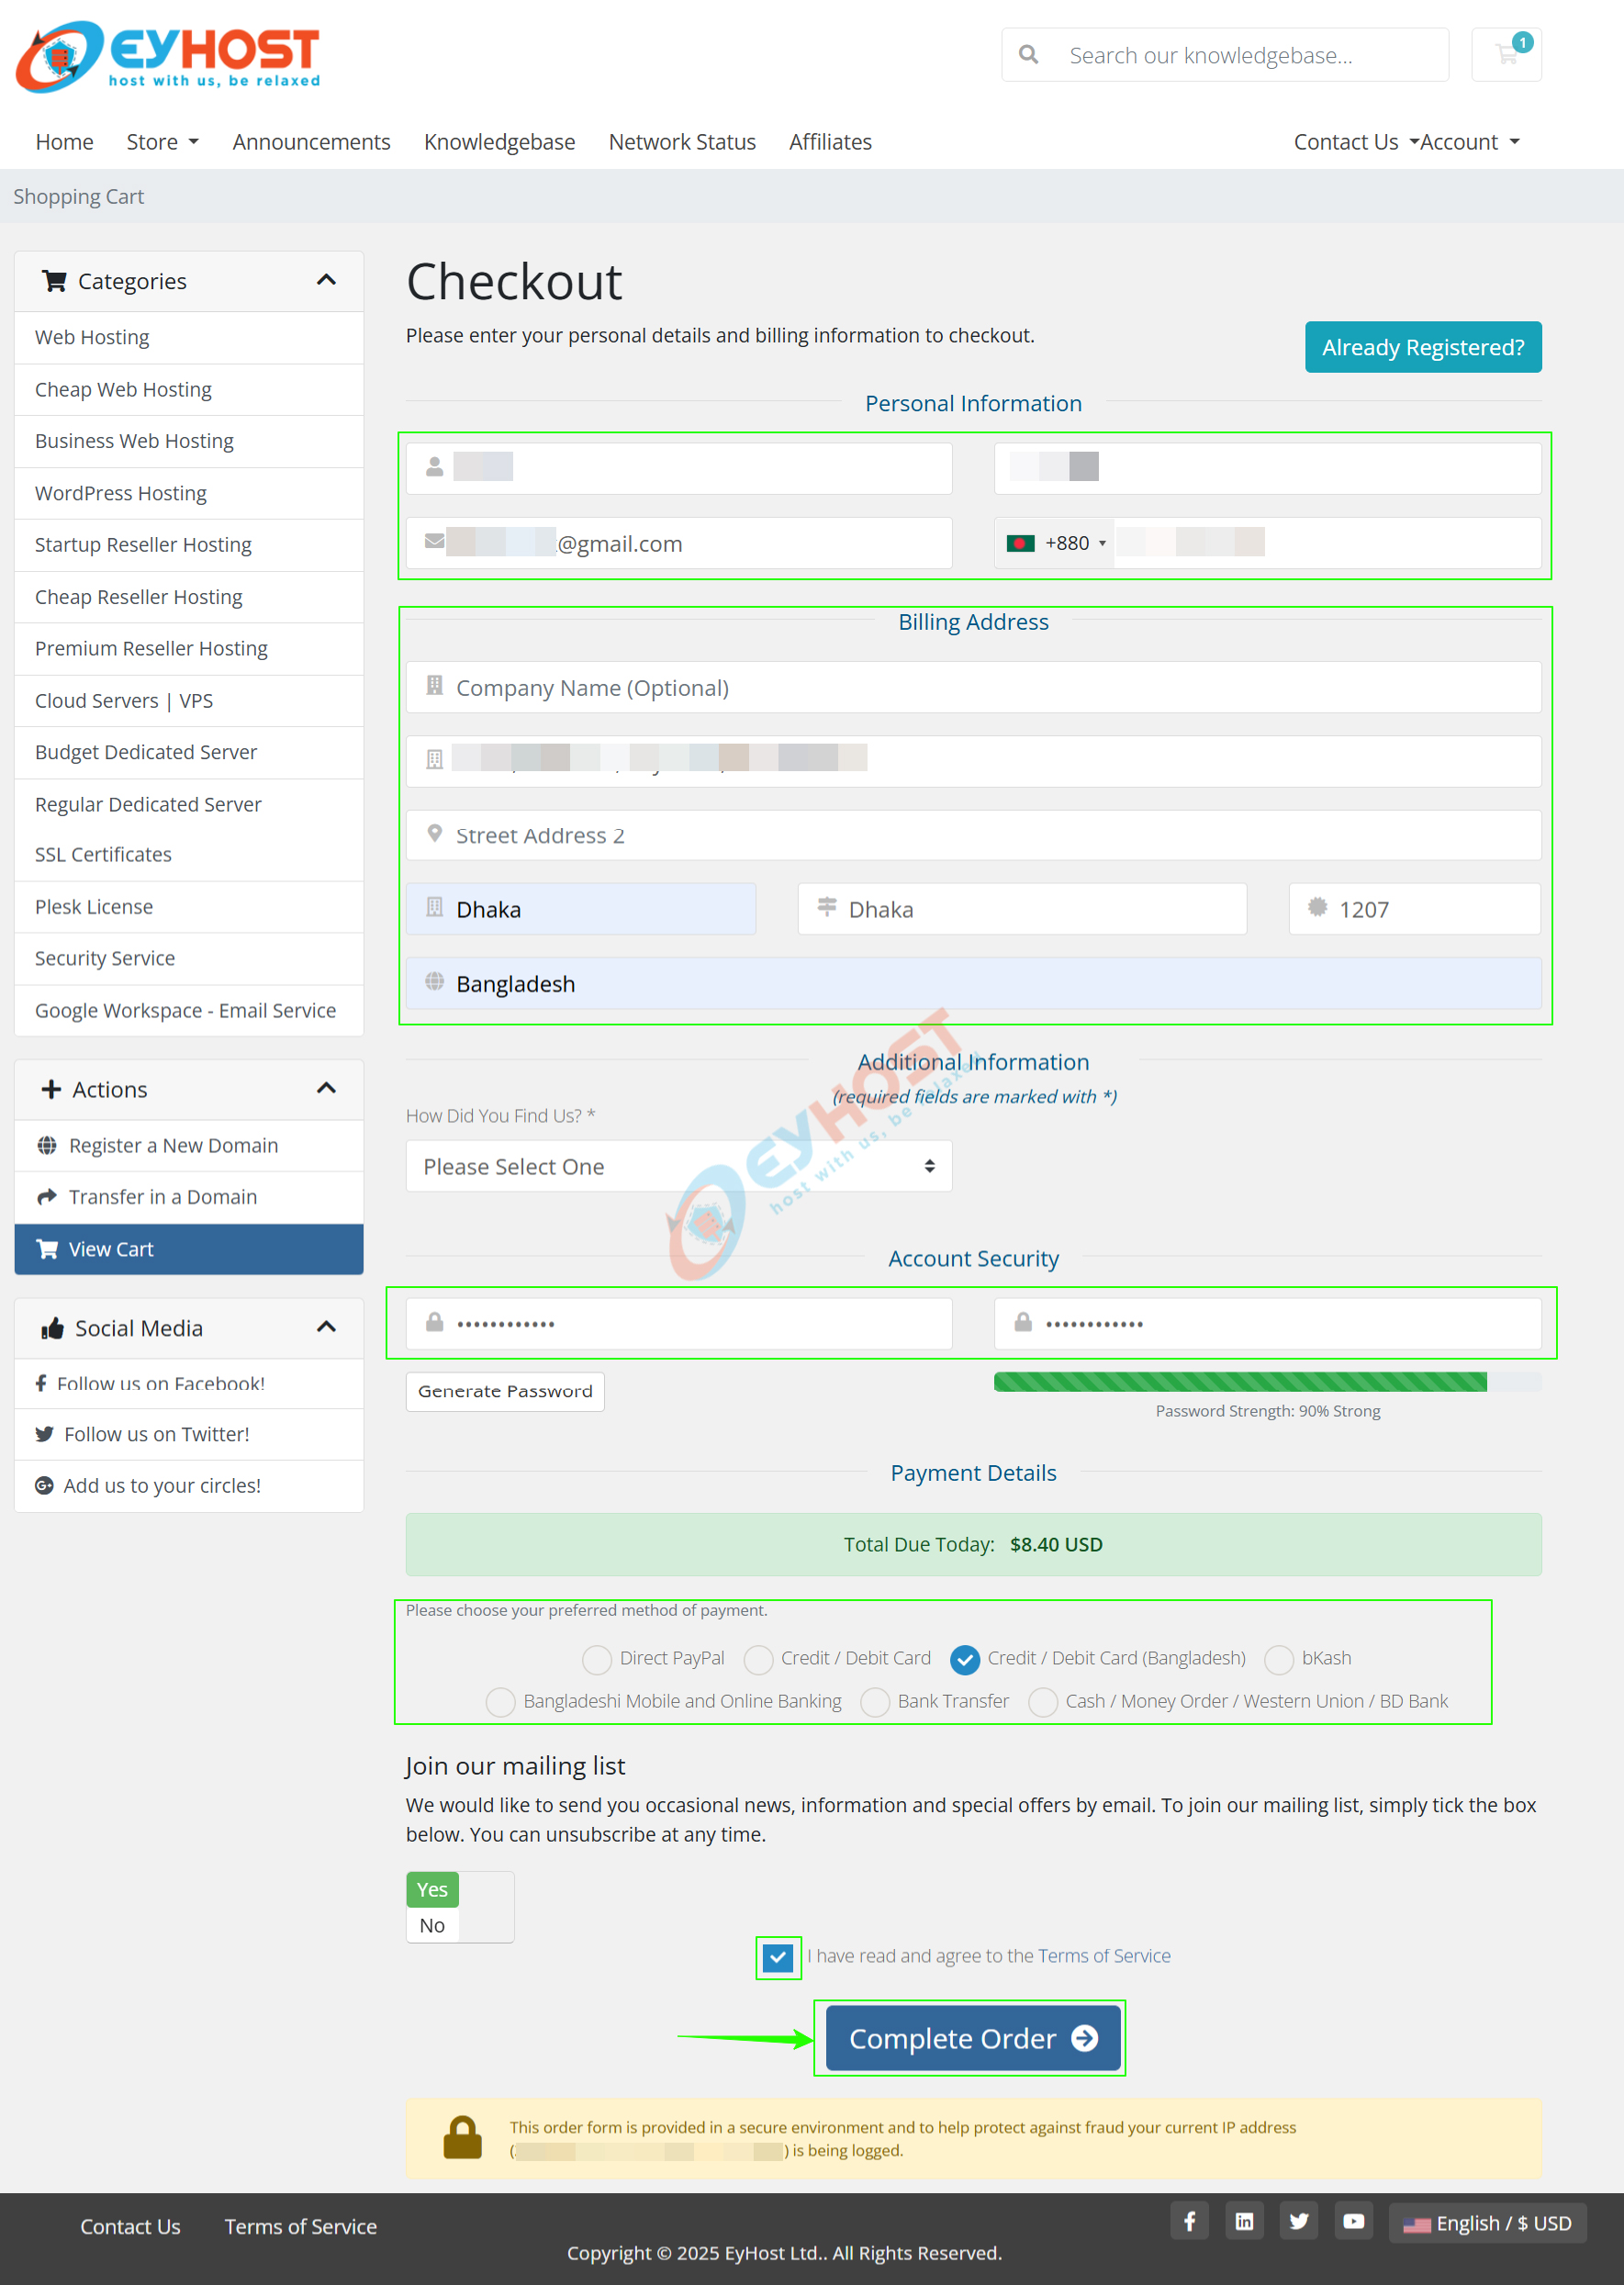
On the checkout page, fill in all the required information including your name, address, phone number, email address, and a secure password. Then, choose a payment method that suits you. Don’t forget to tick the checkbox confirming that you have read and agree to the Terms of Service. Finally, click the “Complete Order” button to finalize your purchase. If you’re an existing EyHost customer, simply click the “Already Registered?” button at the top right to log in and complete your order without re-entering your details.
Step 5:
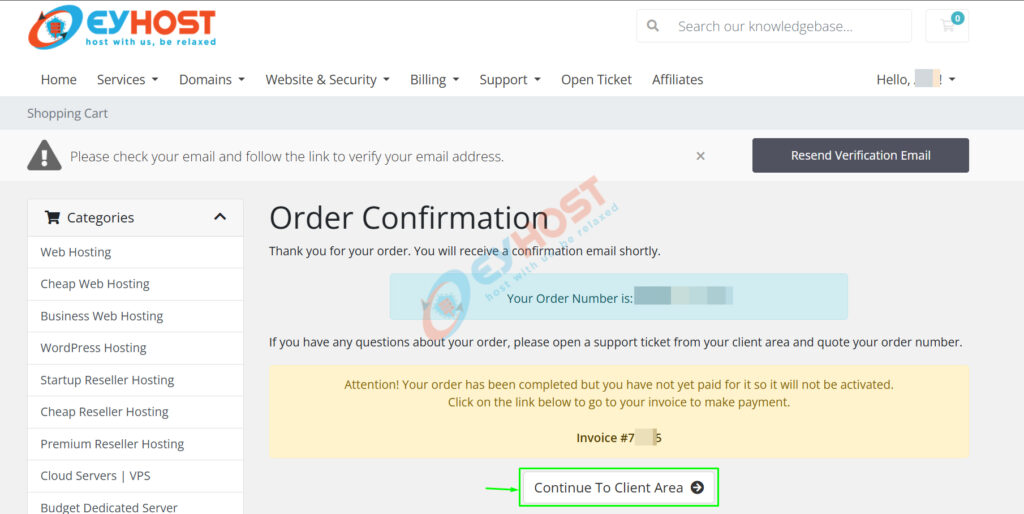
Once your order is successfully placed, you will see a confirmation screen displaying your Order Number and Invoice Number for reference. Click the “Continue to Client Area” button to proceed to your account dashboard. If this is your first time ordering with EyHost, make sure to verify your email address by clicking the verification link sent to your registered email. This step is important to activate your account and ensure smooth service delivery.
Step 6:
To activate your hosting plan, proceed with the payment of your invoice. After placing your order, you can complete the payment directly from the EyHost Client Area. Depending on your selected payment method, follow one of the detailed guides below to complete the process smoothly:
- How to Pay an Unpaid Invoice from the Client Area Portal
- How to Pay an Unpaid Invoice with bKash from the Client Area Portal
Completing your payment will activate your order and allow you to start using your managed WordPress hosting right away. All the required details already will be delivered to your registered mail accordingly.
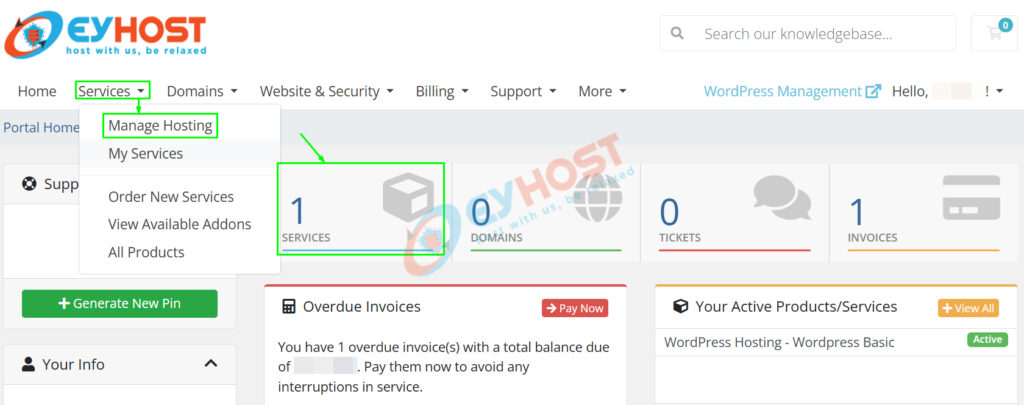
Step 7:
Once your payment is confirmed, log in to your EyHost Client Area. From your dashboard, go to Services > Manage Hosting to view and manage your active hosting package. You can also directly click on the “Services” tab to quickly access your hosting account. This section allows you to manage your WordPress site, access login credentials, and perform essential hosting tasks—all in one place.
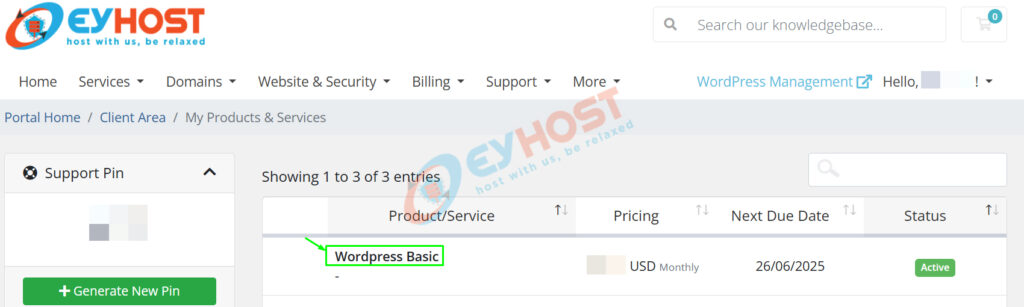
Step 8:
From the Manage Hosting page, click on the name of your WordPress hosting plan to access its settings and management options. For example, if you’ve purchased the WordPress Basic plan, simply click on it.
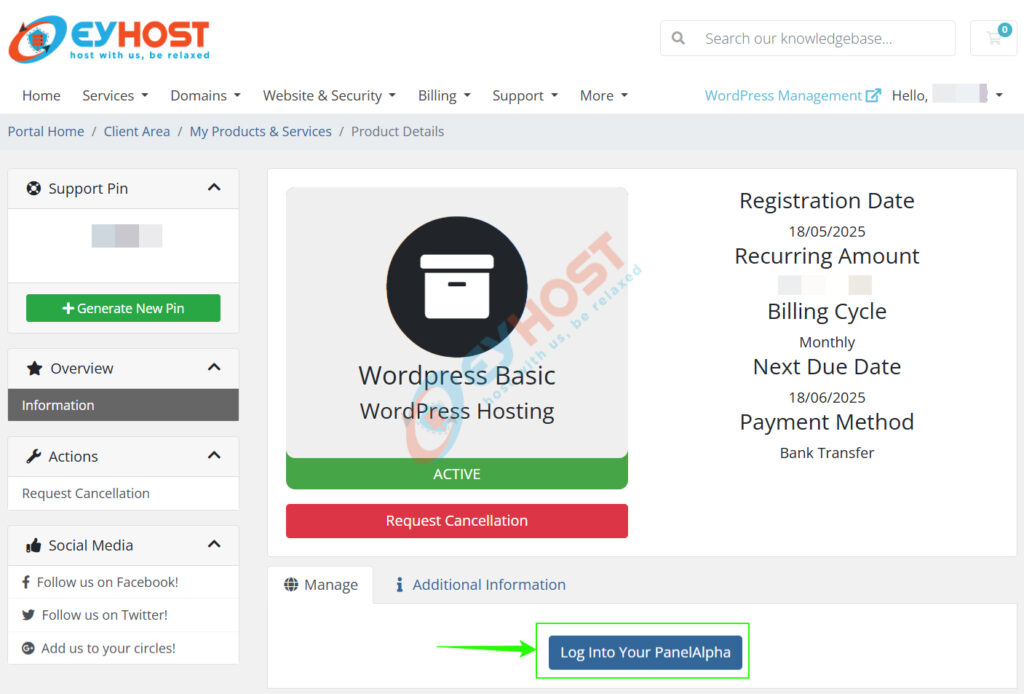
Step 9:
Finally, click on the “Log Into Your PanelAlpha” button to access your WordPress hosting management portal and you will be redirected to the control panel accordingly.
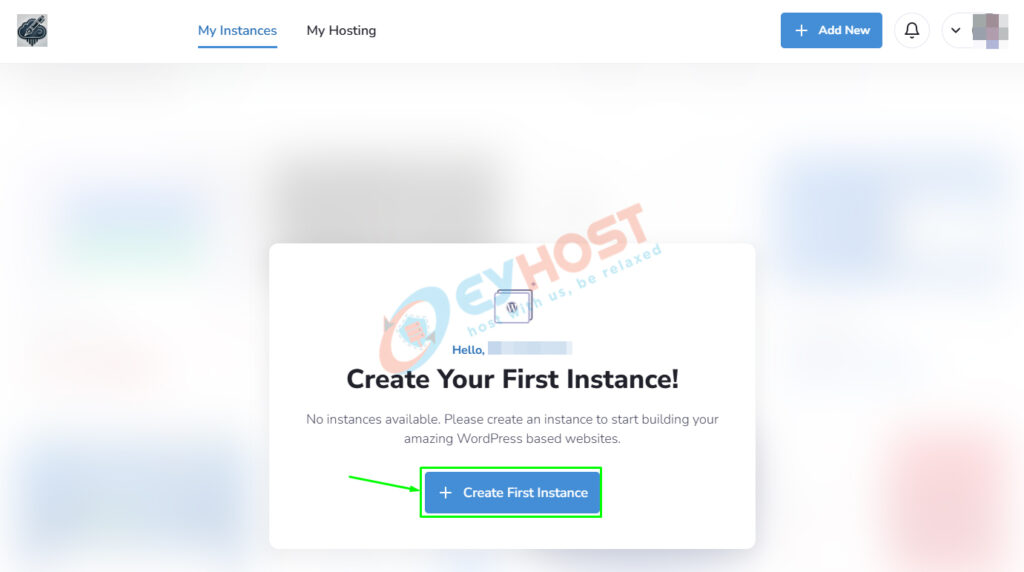
Step 10:
Click on Create First Instance button.
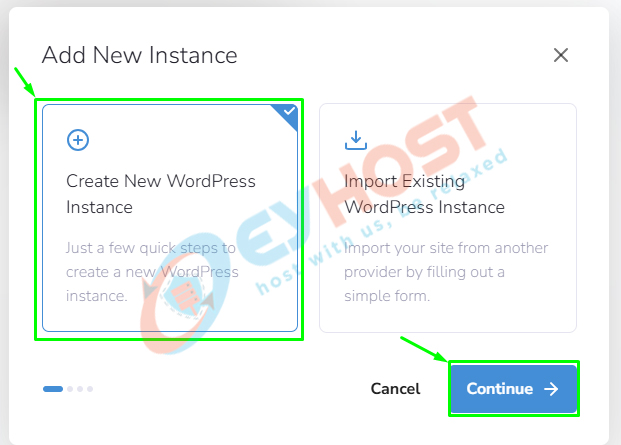
Step 11:
You’ll be given two options: Create New WordPress Instance to start a fresh site, or Import Existing WordPress Instance if you’re migrating a site from another host. For demonstration purposes, we’re selecting “Create New WordPress Instance”, then clicking the “Continue” button to proceed.
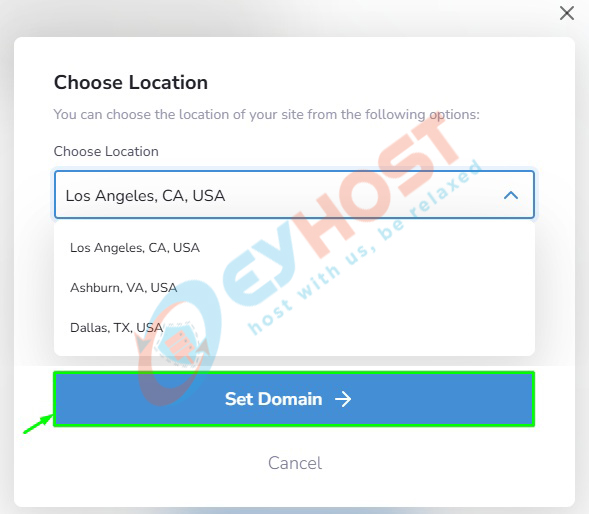
Step 12:
In this step, select your preferred server location from the dropdown menu—this determines where your WordPress site will be hosted. Once selected, click the “Set Domain” button to proceed.
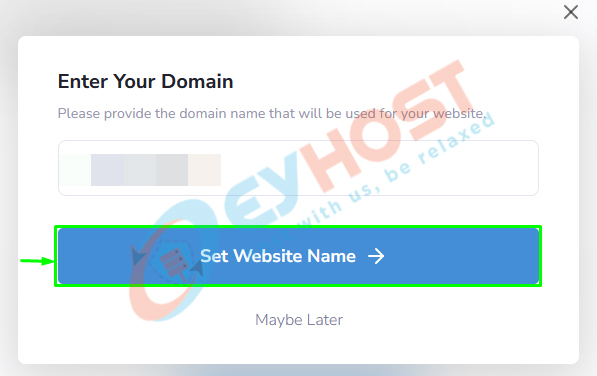
Step 13:
In the next step, enter your domain name in the provided field. This should be the domain you want to associate with your WordPress website. After entering the domain correctly, click the “Set Website Name” button to initiate the setup.
If you prefer to set your site name later, simply click on the “Maybe Later” option to skip this step for now. Either way, your site setup will continue smoothly.
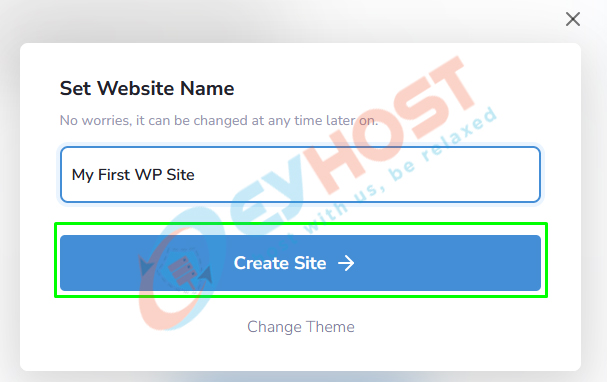
Step 14:
In this step, you’ll be asked to enter your website name as per your preference. For demonstration purposes, we’re typing “My First WP Site” in the provided field. Don’t worry—this name isn’t permanent and can easily be changed later from your WordPress dashboard.
Once entered, click the “Create Site” button to proceed. If you’d like to choose a theme right away, you can click on the “Change Theme” option just below the button.
For now, we’re skipping this step, as the theme can be selected or changed later at any time.
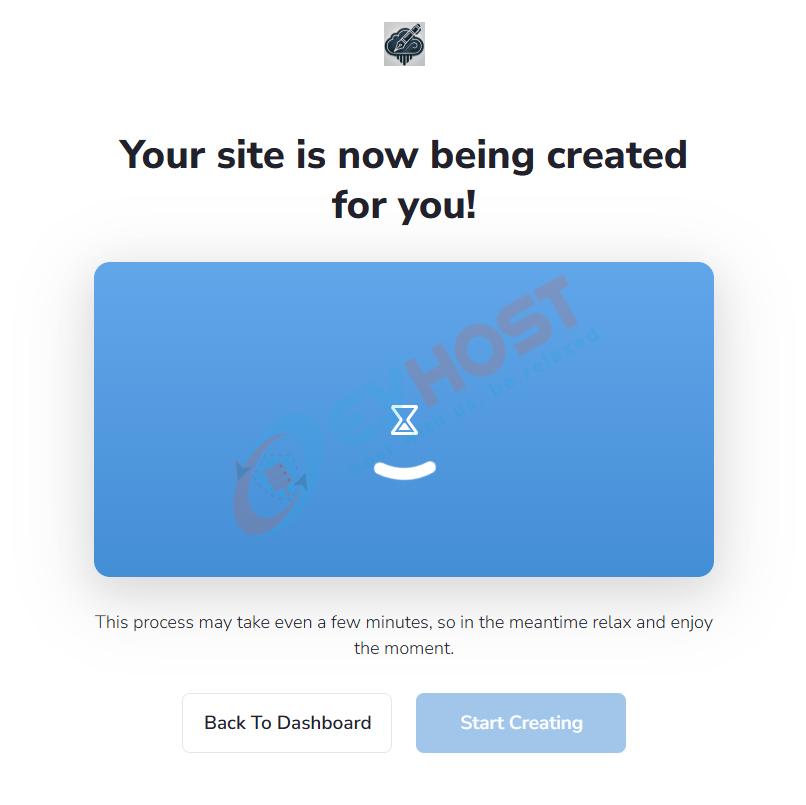
After clicking, you’ll see a screen confirming that your site is now being created — as shown below
Step 15:
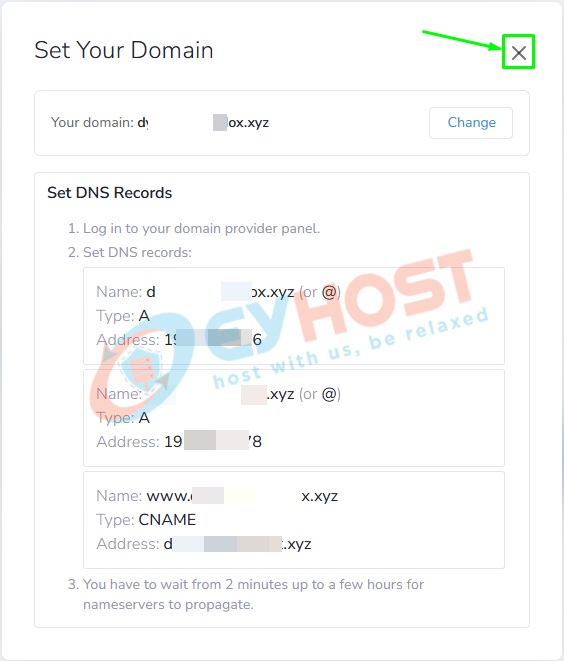
Once the setup process is successfully completed, you’ll see a confirmation message: “Your Site Has Been Installed.” This means your WordPress instance is now live on the server (though not yet publicly visible until the domain is pointed). Additionally you will get to see get all the required DNS (A Record & CNAME) records to point your domain to the correct hosting server.
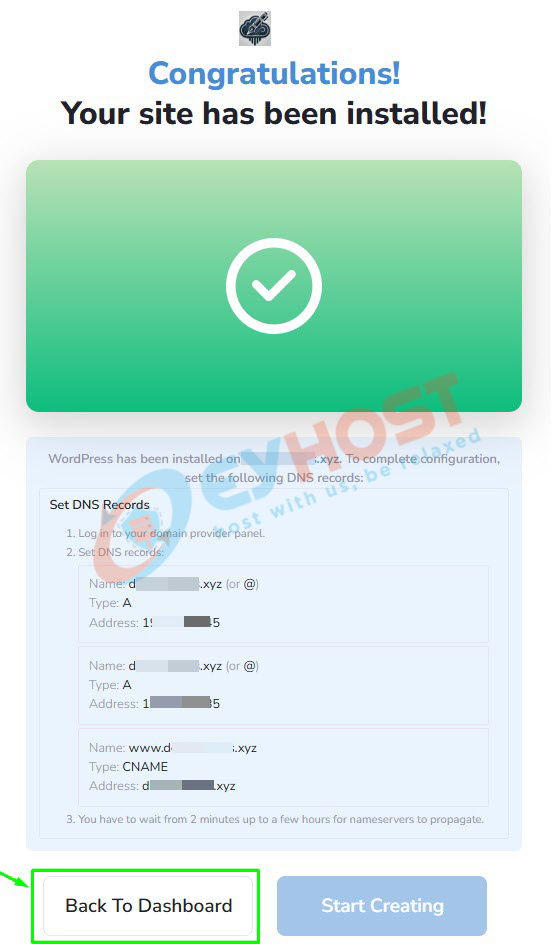
Use these DNS records to point your domain correctly from wherever your domain’s DNS is currently managed.
- 🔹 If your domain is registered with EyHost, follow this guide to add the correct DNS records easily from your client area.
- 🔹 If your DNS is managed through a third-party provider (e.g., Cloudflare or your previous hosting server), log in there and update the records accordingly.
Keep in mind Correct DNS setup is essential to ensure your WordPress site becomes publicly accessible on the web.
Click on the “Back to Dashboard” button to return to your hosting management panel, where you can now manage your WordPress instance, update settings, and prepare your site for launch.
Step 16:
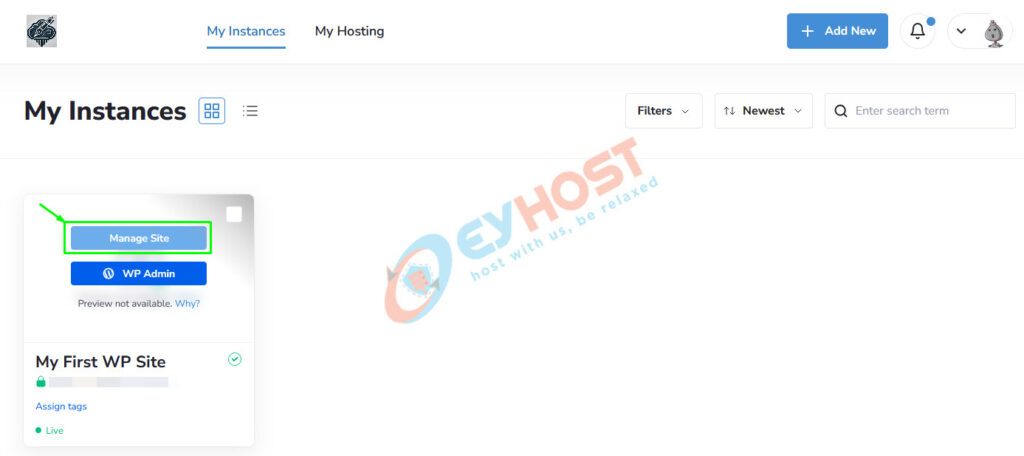
From your hosting Dashboard, navigate to the “My Instance” section where your newly created WordPress site is listed. Hover over your instance and click on the “Manage Site” button at the top.
This will open your site management panel, giving you access to tools for managing WordPress-specific settings to customize and control your website.
Step 17:
Once inside the site management panel, you’ll see all the general information related to your WordPress instance.
As mentioned in the earlier step, to make your website accessible online, you need to point your domain to the hosting server using the correct DNS records.
If you need to view the DNS records again, simply click on the “Change Domain” option located just below your WordPress instance name (e.g., “My First WP Site”). This will display the required A Record and CNAME values once more, allowing you to update or verify your domain settings from wherever your DNS is managed.
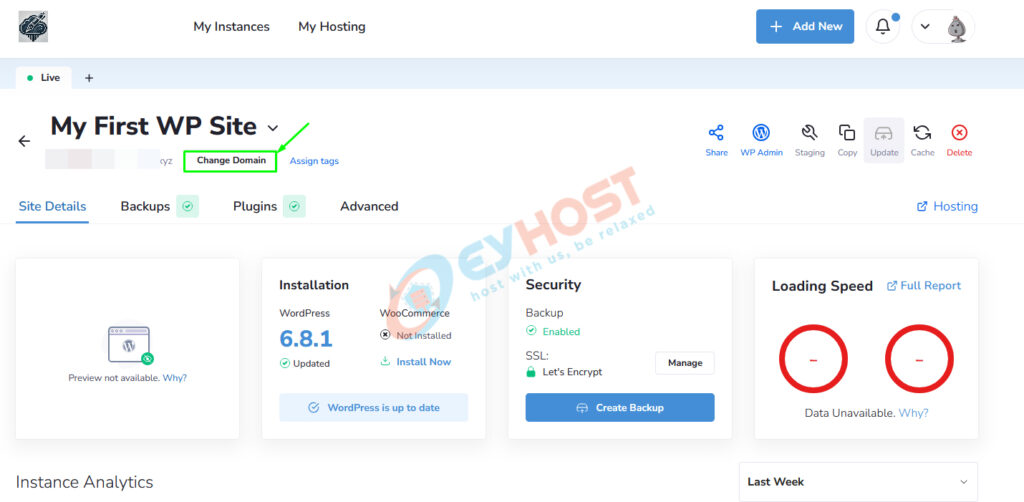
Once you’ve copied or noted the necessary DNS details, you can close the DNS information popup by clicking the close (×) icon at the top right corner of the panel.
Use these DNS records to point your domain correctly from wherever your domain’s DNS is currently managed.
For further WordPress management guide, tips & tricks keep visiting our WordPress related posts.

